


SmartThings HomeKit Integration
I previously created a tutorial showcasing HomeKit integration using Hombridge on a Mac. However, leaving a Mac running 24/7 is not a feasible option for some people, thus I decided to create a tutorial for Raspberry Pi, as it is an affordable alternative solution. If you aren’t familiar with Raspberry Pi, I recommend purchasing a Starter Kit. It comes with everything you need to get started (including preinstalled software), however you will also need a monitor, keyboard, and mouse for the initial setup. Afterwards, you can enable VNC on your Pi so you can remotely connect to it (Screen Sharing).
When paired with a pair of speakers, the Raspberry Pi can also voice audio notifications for SmartThings, function as an AirPlay Receiver, host a VPN Server, and even replicate the functionality of an Amazon Echo.
The Setup
-
Launch Terminal and input the following command (without quotes): “curl – sSL goo.gl/Ksdhph | bash”
This will run some code for 10-15 minutes.
This is an excellent video that showcases this process. Follow until (1:28), don’t proceed any further
-
Once that is completed, type “homebridge” (refer to 0:59) of the video.
-
Once you see the pair code, quit home bridge with a ctrl c.
-
Install the SmartThing’s plugin, input “sudo npm install -g homebridge-smartthings” into terminal.
-
Follow the video below from 2:07 to 3:26
GitHub Integration Tutorial
Owner of “pdlove” and name of “homebridge-smartthings” and branch of “master” and then click save.
-
Obtain the local IP Address of your Raspberry Pi and note it down. It should be something like 192.168.x.x or 10.0.1.x
-
Download the config.json file (right click and download) and launch it with your favorite code editor app. (TextEdit won’t work) I am using TextWrangler.
Replace the APP ID and APP TOKEN you previously copied from the SmartThing’s app. And input your Raspberry Pi local IP.
-
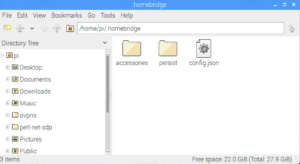
Transfer the config.json to your Pi (email/flash drive) and place it in the /home/pi/.homebridge directory.
-
On Terminal input “homebridge” to run homebridge. You will see the pair code that you can implement in the “Home App” as an accessory on your iOS Device.
That’s It! If you ever need to shutdown Homebridge simply type ctrl c.
Please leave a comment if you have any questions and please subscribe to our YouTube Channel.
Links:
UPDATE SEPT. 21 2017:
IF YOU GET AN ERROR – USE TERMINAL COMMAND:
sudo npm install -g –unsafe-perm homebridge
sudo npm install -g –unsafe-perm homebridge-smartthings
Advertisements

GET $97 OFF DreamHost Web Hosting. DreamHost
is U.S #1 Hosting. Sign up with DREAMHOST or use
this promotion code MACTECHGENIUS
“curl – sSL goo.gl/Ksdhph | bash” not working.
Getting this:
% Total % Received % Xferd Average Speed Time Time Time Current
Dload Upload Total Spent Left Speed
0 0 0 0 0 0 0 0 –:–:– –:–:– –:–:– 0curl: (6) Could not resolve host: xn--7ug
curl: (6) Could not resolve host: sSL
100 279 0 279 0 0 3648 0 –:–:– –:–:– –:–:– 3648
bash: line 1: syntax error near unexpected token `newline'
bash: line 1: `<HTML>'
Can you verify the internet connectivity of your raspberry pi?
Just go to goo.gl/Ksdhph in your browser and copy paste one line at a time into the terminal.
How to start on bootup?
would this work for european user?
I notice some diffrence in installing the smart app.
We use https://graph-eu01-euwest1.api.smartthings.com
It should
so only place i have to change from https://graph.api.smartthings.com to https://graph-eu01-euwest1.api.smartthings.com is in the config.json file? or did i miss it somewhere else ? I can see the adress is the europen one under confing in smarthings app ios. Im not able to connect in home app. It finds homebridge but the times run ut after typing inn the code.
Can you post your issue on the SmartThing’s thread: https://community.smartthings.com/t/homekit-integ… a screenshot. It would help a lot.
I manage to make it work on when i made a new config.json file. 🙂 Nice guide!
Hi herm, can you show me how to do it?
I got an issue with the config.json, after do everything and type 'homebridge' i got an error related to smartthings, this is as it shows:
[10/14/2017, 10:52:52 PM] ====================
[10/14/2017, 10:52:52 PM] No plugins found. See the README for information on installing plugins.
[10/14/2017, 10:52:53 PM] Loaded config.json with 0 accessories and 1 platforms.
[10/14/2017, 10:52:53 PM] —
[10/14/2017, 10:52:53 PM] Loading 1 platforms…
/usr/local/lib/node_modules/homebridge/lib/api.js:122
throw new Error("The requested platform '" + name + "' was not registered by any plugin.");
^
Error: The requested platform 'SmartThings' was not registered by any plugin.
at API.platform (/usr/local/lib/node_modules/homebridge/lib/api.js:122:13)
at Server._loadPlatforms (/usr/local/lib/node_modules/homebridge/lib/server.js:284:45)
at Server.run (/usr/local/lib/node_modules/homebridge/lib/server.js:80:36)
at module.exports (/usr/local/lib/node_modules/homebridge/lib/cli.js:40:10)
at Object.<anonymous> (/usr/local/lib/node_modules/homebridge/bin/homebridge:17:22)
at Module._compile (module.js:570:32)
at Object.Module._extensions..js (module.js:579:10)
at Module.load (module.js:487:32)
at tryModuleLoad (module.js:446:12)
at Function.Module._load (module.js:438:3)
i leave the top of config.json mostly the same, just rewrite the MAC, now its like this:
"bridge": {
"name": "Homebridge",
"username": "",
"port": 51826,
"pin": "031-45-154"
},
should i place something else instead Homebridge?
Did you enable oAuth on the smartthings IDE?
Yes, oAuth is enable for that app. Generate the text with smart app, use rpi IP address. I was thinking maybe something related to permission and port use? I’m new on this, don’t know how to do it, any idea?
Check out the official homebridge thread on the official SmartThing’s community forum. Post your issue there with some screenshots.
I got this working great on a Pr 3b, but some outlets show up twice, any way to fix this?
Hi!
Got this working a few weeks ago and love it!
Is there a script to launch homebridge upon reboot?
Hi,
Homebridge is showing in Homekit ( with property unauthorized ) , but i don't see my Samsung TV module at HomeKit. i don't see any accessory in HomeKit.
Am I missing something ?
Man you made it so easy! Thanks, only hiccup i had was the first line "curl – sSL goo.gl/Ksdhph | bash" it did not work for me i had to add the "http" so "http://goo.gl/Ksdhph" then it works for me.
Hello, Everything seems to match the instructions, but none of the devices selected in the JSON app show up under homebridge. I checked url/id/token in the config.js and they match to the app config.
Any ideas?
Thank you for the details, luckily I found this on source.
is it still working? because mine stopped working. i tried to reinstall it on pi no luck